
Stop Taking Boring Photos: 7 Smartphone Photography Secrets from a Pro
Do you have a $1,000 smartphone in your pocket, but your photos still look... flat, blurry, or just plain boring?
If you're nodding your head, you are not alone. Hi, I'm Dariusz Terepka, a professional photographer and the founder of Best in CT. I've spent my career capturing beautiful, dynamic images for clients across Connecticut, and I can tell you a secret: the most expensive camera doesn't guarantee a good photo.
The real secret is in the technique, not the gear.
Your phone's camera is incredibly powerful. You just need to know how to unlock its potential. Today, I'm sharing 7 simple, game-changing secrets that I use as a pro, which you can apply to your smartphone today to make your photos look stunning.
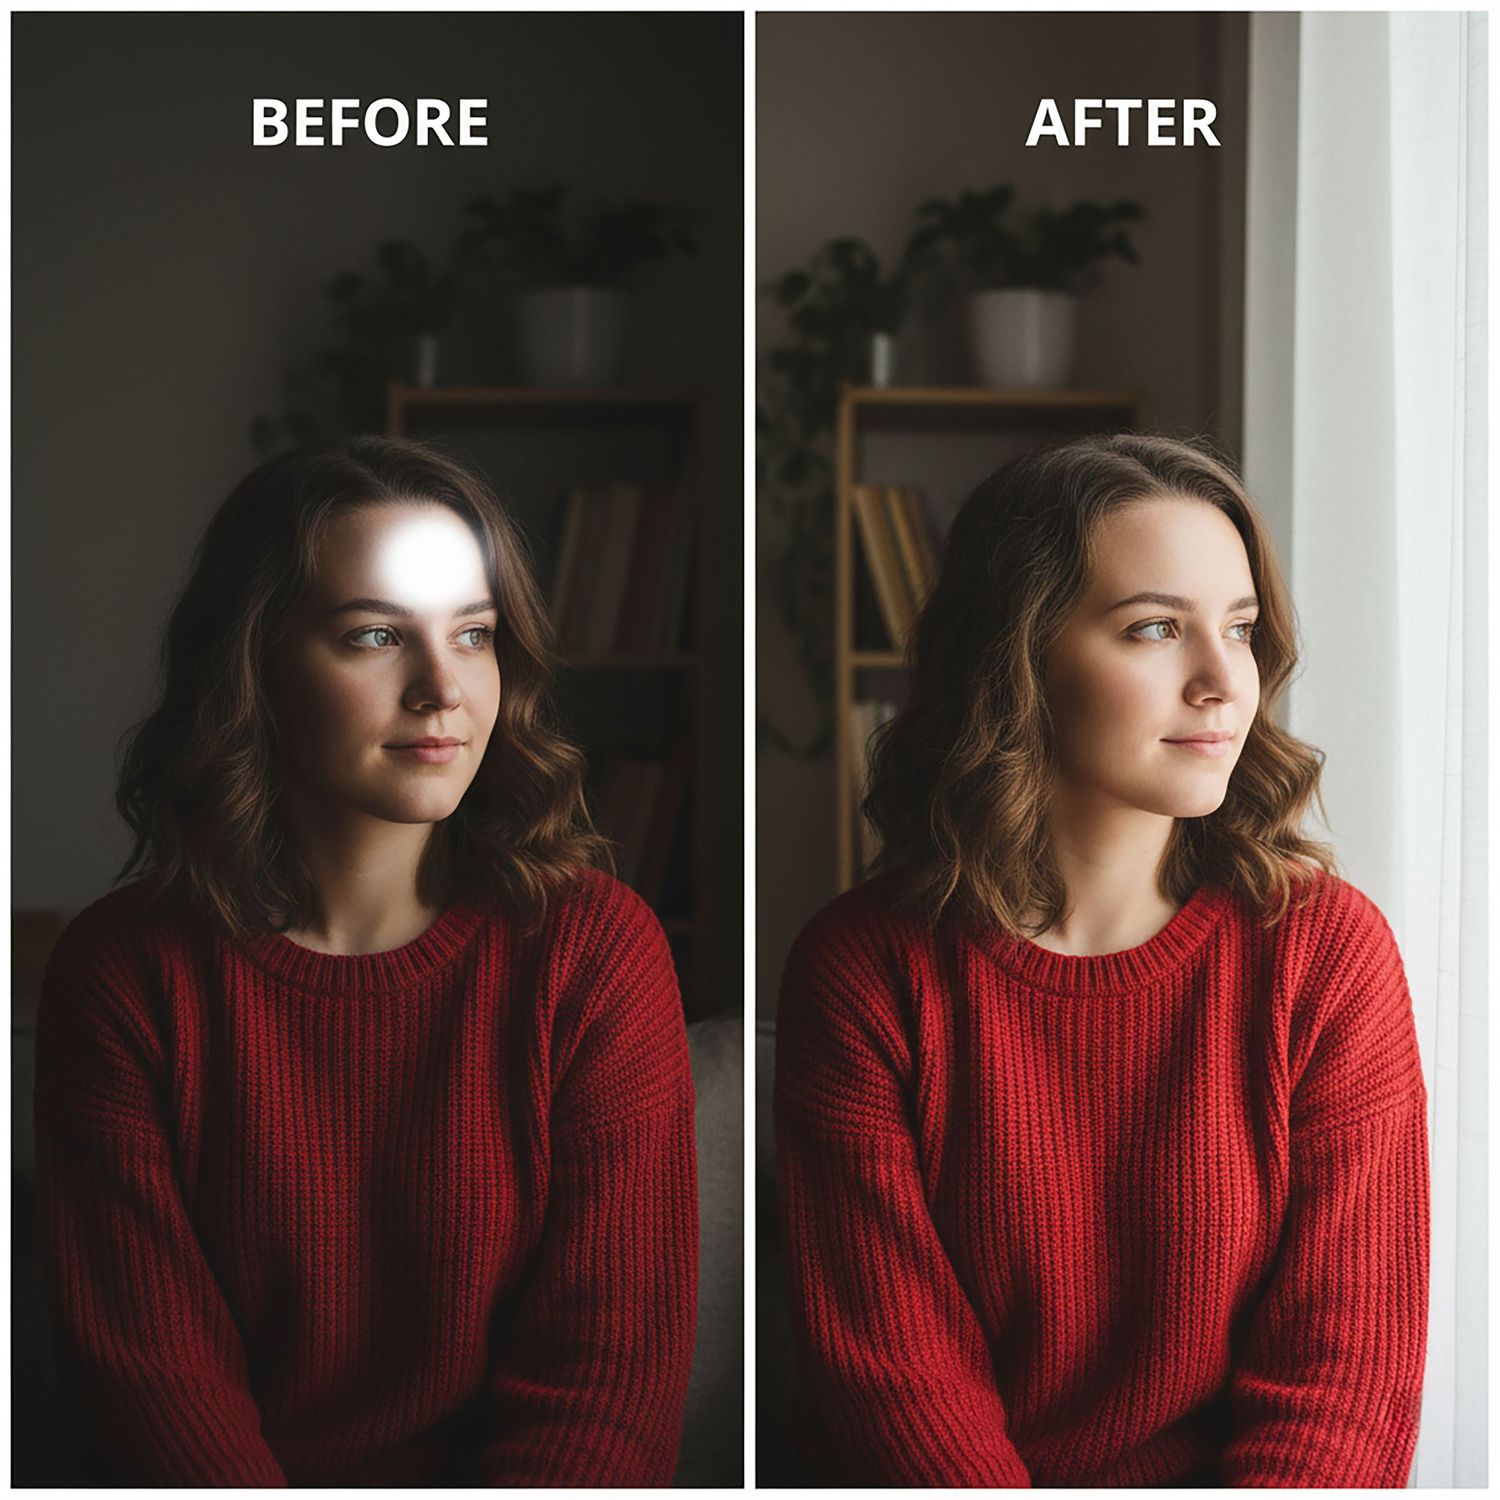
1. Stop Using the Flash (And Start Finding the Light)
The single worst thing you can do to a photo is use your phone's built-in LED flash. It's harsh, creates weird shadows, gives people "red-eye," and makes everything look flat.
- The Problem: Using the harsh, direct flash.
- The Pro Tip: Turn your flash OFF (not "Auto"). Instead, learn to find the light. The best light is soft and angled. The easiest source? A window.
- Try This: Have someone stand facing a window (with the light on their face). The difference is night and day. For food, sit near the window in a restaurant. For landscapes, shoot during the "Golden Hour" (the hour after sunrise or before sunset).

2. Turn On Your Camera Grid (It's Not for Cheating)
You know those light lines on your camera screen? They're not just for making sure your photo is straight (though they help with that, too). They are your single most powerful composition tool.
- The Problem: Your subject is always "dead center," which is often boring.
- The Pro Tip: Go to Settings > Camera > Grid and turn it ON. This grid uses the "Rule of Thirds." The goal is to place your main subject not in the center box, but on one of the four points where the lines intersect.
- Try This: When taking a photo of a person, line their eye up with one of the top intersecting points. When shooting a landscape, place the horizon line on the bottom or top horizontal line, not in the middle.


3. Stop "Tapping to Focus"—Start "Tapping and Holding"
You probably know to tap your screen to tell the camera what to focus on. But what happens when the lighting is tricky? Your phone "hunts" for focus, or the sky is bright white, or your subject is a dark silhouette.
- The Problem: The camera's focus or brightness (exposure) keeps changing.
- The Pro Tip: Don't just tap. Tap and hold on your subject for a second. A yellow box will appear, often with "AE/AF LOCK." This locks the Auto-Exposure and Auto-Focus. Now you can slightly move your phone to perfect the composition, and your settings won't change.
- Bonus Hack: After you tap, a small sun icon will appear. Slide your finger up or down on the screen before you take the shot to manually make it brighter or darker.


4. Stop Pinching to Zoom (Use Your Feet!)
When a subject is far away, what's your first instinct? You pinch the screen to zoom in. This is called "digital zoom," and it's ruining your photos.
- The Problem: Pinching to zoom creates a blurry, pixelated, low-quality image.
- The Pro Tip: Digital zoom isn't "zooming"—it's just cropping the photo before you even take it, throwing away millions of pixels. The professional move? Use your feet. Walk closer to your subject.
- The Exception: If your phone has a "2x" or "3x" button, that is an optical zoom. Use that button! But never, ever pinch. If you can't get closer, take the wide shot and crop it later.
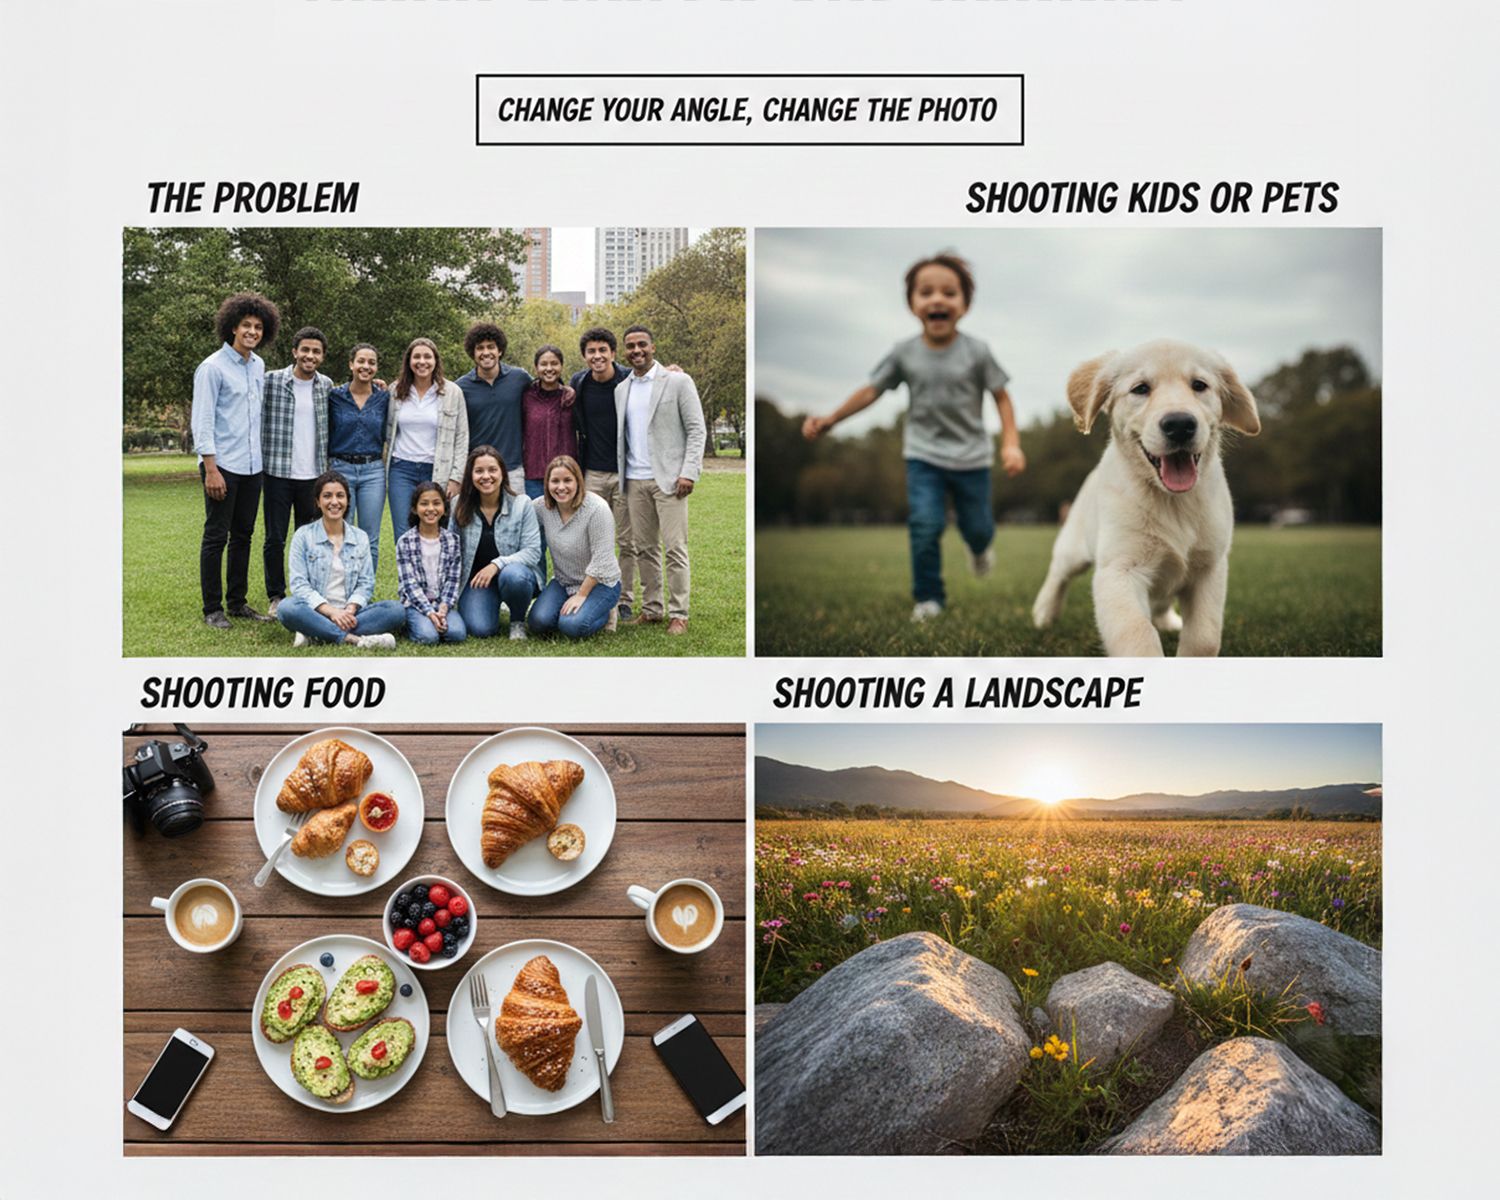
5. Get Off Eye-Level (Your Angles Are Boring)
We see the world from about 5-6 feet off the ground. We also take almost all of our photos from that same height. That's why they all look the same.
- The Problem: Every photo is taken from a standing adult's perspective.
- The Pro Tip: Change your angle, change the photo.
- Shooting kids or pets? Get down on their level. Squat, sit, or even lie on the ground.
- Shooting food? Get directly overhead for a "flat lay" shot.
- Shooting a landscape? Get super low to the ground to make the foreground (like flowers or rocks) look grand and epic.
6. Use Portrait Mode for More Than Just People
That "Portrait Mode" on your phone (the one that makes the background blurry) is your best friend. But it's not just for portraits.
- The Problem: You only use Portrait Mode for selfies or photos of your friends.
- The Pro Tip: "Portrait Mode" is just a tool to create a "shallow depth of field"—that professional-looking blurry background called bokeh. Use it to isolate any subject.
- Try This: Use Portrait Mode on a flower in a garden, your cup of coffee on a table, or a piece of holiday decor. It instantly makes your subject "pop" and look like it was shot with a high-end camera.
7. The 30-Second Edit That Changes Everything
Your photo is shot, but it still looks a little... dull. The "pro" look often comes from a simple, 30-second edit. You don't need a fancy app; your phone's built-in "Edit" function is perfect.
- The Problem: Your photo looks "flat" or "gray" straight out of the camera.
- The Pro Tip: Open your photo and tap "Edit." Ignore the filters. Find these three controls:
- Shadows: Slide this up. It will bring back all the detail in the dark parts of your photo.
- Highlights: Slide this down. It will bring back the detail in the bright parts (like the clouds in a bright sky).
- Vibrance/Warmth: Add just a tiny bit of vibrance (or warmth) to make the colors pop without looking fake.
.

The Difference Between a Great Snapshot and a Professional Portrait
I'm the biggest believer in using your phone every single day. The tips above will genuinely transform your daily photos, your social media, and your personal albums.
But there's a critical difference between capturing a great moment and creating a timeless image. Your phone is perfect for capturing those everyday "snapshots."
So when do you need to call a pro? You call a pro when the stakes are high and "good enough" isn't good enough.
1. Headshots & Personal Branding
- Smartphone: "Portrait Mode" is a computational filter that just blurs the background. It often messes up hair, glasses, and ears.
- Pro: I use real optical lenses and professional lighting (strobes, softboxes) to create genuine, flattering depth and a portrait that communicates confidence. A headshot isn't a selfie; it's your career's first impression.

2. Family Holiday Photos
- Smartphone: You're stuck using a selfie-timer, trying to get 5 people (and the dog) to look at a tiny lens, all while you're running back and forth. Someone is always blinking, and the light is never right.
- Pro: As a professional, my job is 50% photography and 50% wrangling. I know how to pose groups, make kids laugh, and get that perfect shot in a fraction of the time, so you can just enjoy the moment with your family.
3. Event Photography (Weddings, Anniversaries, Bar Mitzvahs)
- Smartphone: These are high-speed, low-light, "one-shot" moments. A phone camera will struggle in a dim church or reception hall, producing grainy, blurry, or dark images. There is no "do-over" for the first kiss or the candle-lighting ceremony.
- Pro: This is where pro gear is non-negotiable. My full-frame cameras are built to handle low light. My flashes can light up a whole room softly. I have backup cameras, backup batteries, and the experience to know where to be before the moment even happens. You get to live your event; I'll take care of capturing it.
Your smartphone is for practice. Use it to train your eye, play with light, and find angles.
But when you need to freeze a memory for a lifetime, or when the photo has a job to do (like get you your next job), that's when you invest in a professional.
Your Turn to Create Amazing Photos
The best camera is the one you have with you. As the photographer behind Best in CT, my job is to capture moments beautifully, and now you have the tools to make your daily photos look dramatically better.
Start with one of these tips. Master it. Then try the next. I promise that if you focus on light, composition, and these simple settings, your photos will change overnight.
And, of course, when you're ready for those once-in-a-lifetime photos that go beyond your smartphone—for your family, your wedding, or your business—you know who to call.
Let's Talk!
Which one of these tips will you try first? Leave a comment below!
If you found this helpful, please share this post with a friend who needs to up their photo game.
And if you're in Connecticut and need professional photos, contact me via email Dariusz@bestinct.com, call or text 718-415-2418


